

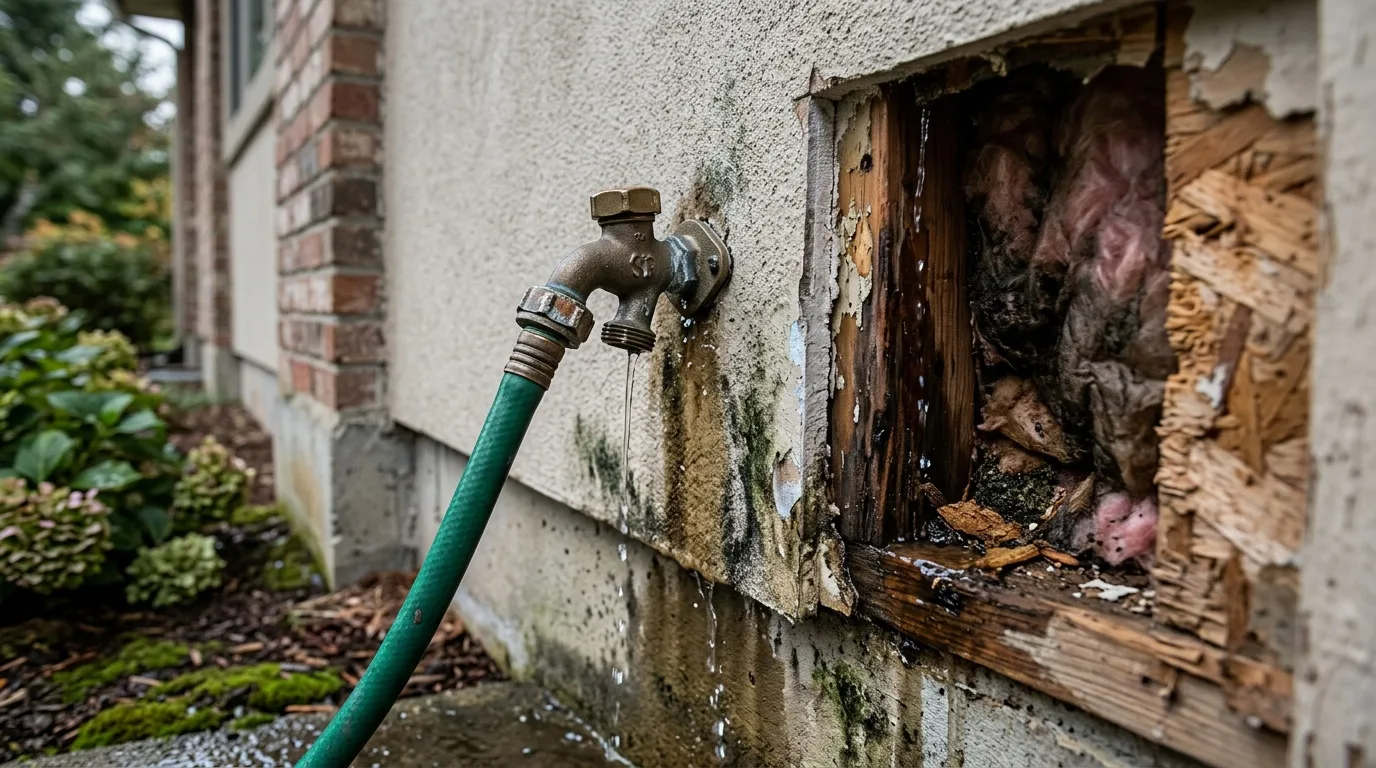
A wet spot on the wall or a drip under a fitting is not always a reason to open up the floor and spend a lot of money. But sometimes a month of waiting costs exactly that. An outdoor faucet leaking in the wall is one of those cases: the hose bib is outside, the valve and the pipe are inside, and the water goes where nobody looks.
These days it is common to hide plumbing behind the finish. It gives the rooms a neat look, but if there is a leak, the finish most likely has to be redone. Without special instruments it is impossible to find the exact place where water is seeping.
How an Outdoor Faucet Through the Wall Is Built
Most homes in El Cajon have a standard hose bib: a brass faucet screwed onto a copper pipe that comes out through the stucco, with the valve right in the faucet. Frost-free faucets, with the valve deep inside the wall, are a cold-climate design and are less common here.
The Stem Seal and Packing Nut: When the Hose Bib Leaks From the Handle
On the outside, the stem is sealed with a rubber (EPDM) ring, which is pressed by two washers and a nut. This is the packing nut.
A steady stream from under the handle while the faucet runs points to the stem seal. Tightening the packing nut under the handle about a quarter turn often stops it; if not, the packing washer is replaced with the water off.
The Vacuum Breaker Cap
On top of the outlet, almost every model has a cap, plastic or brass: the vacuum breaker. It keeps dirty water in a hose from being siphoned back into your drinking water if the pressure drops. Plumbing codes, California's included, require this backflow protection on hose bibs. When its seal wears out, it spits water from the top while the faucet runs; the fix is a new vacuum breaker, not a new faucet.
Where an Outdoor Faucet Leaks Inside the Wall
In El Cajon a hose bib almost never freezes. Inside the wall, leaks usually come from the joint where the faucet threads onto a fitting behind the stucco, from a copper pipe that has corroded where it passes through the stucco, or from a pinhole in the pipe behind it. Yanking on a hose, hanging a heavy hose reel on the faucet or forcing a stiff handle twists the faucet and loosens that hidden joint over time. When it leaks, the water runs down inside the wall, and the faucet has to come off to reach it.
Signs of a Leak Inside the House
A hidden leak is more dangerous than a visible one: wood and drywall soak up water for weeks before a stain appears. You can tell on your own that there really is a leak by these signs:
- Water use went up noticeably. It shows as a much larger amount on the water bill.
- The meter keeps running even when every faucet is closed.
- Dampness in the corners of rooms and mold.
- Paint has bubbled as a result of a wet wall.
- Plaster or drywall compound started falling off.
- A musty smell in the utility room or the crawl space.
- A dark stain on a wall or floor that does not dry after cleaning; on the inside of an exterior wall it often shows first along the baseboards.
Quick Checks Before Calling Anyone
- Read the meter. With all faucets closed, check whether the meter moves. Even a quart or two an hour adds up over a month to a higher water bill and a wet floor structure. The EPA WaterSense leak-check guide describes the same meter test.
- Watch the pressure. If the system loses pressure for no visible reason, water is going somewhere.
- Leaks only while it runs? Water from under the handle points to the packing nut; water spitting from the cap on top points to the vacuum breaker.
- Leaks all the time? If the meter moves with everything closed and the wet spot inside sits behind the faucet, suspect the pipe or the joint behind the stucco.
- Grab the faucet. If it turns or wobbles in the wall, the joint behind it has likely been loosened.
Repair: Fix the Part or Replace the Faucet
If the faucet is damaged, for example the body has split, it should be replaced with a new one. If only the packing, the washer or the vacuum breaker is worn, try to find that part and replace only it. It costs less.
For a pipe, a pinhole is the one case where a temporary repair is justified: with the water shut off, a clamp with a rubber gasket stops the leak. This works if the pipe is not old, there is no sign of the metal flaking around the hole, and it is the first breakthrough on that section. If the same pipe already has a clamp on it, corrosion is likely going along its whole length, and the next pinhole may show up soon, just in another place.
- A crack longer than about 2 inches. A lengthwise crack ends that section of pipe. It cannot be patched: the metal along the crack is deformed and will not hold a seam. The section is replaced, or, if the pipe is old, the whole run.
- Leaks in several places at once. Two or more leaks on one line are a sign of wear across the system. Spot repairs only put off the inevitable.
- A hidden run in the wall. If the pipe is buried and leaking, a plumber has two options: open the wall and replace it, or run a new line in a chase or on the surface.
Drying the Wall Cavity and Mold
For leaks in living spaces, a combined method is popular: a thermal camera plus a moisture scanner. The biggest plus of the thermal camera is that the leak is found fairly precisely. That means you most likely will not have to tear down the whole wall and ruin the finish; it is enough to cut a small section to get to the leaking spot in the pipe and fix it.
To dry the wall cavity, the baseboard is pulled and the lower part of the drywall is opened or drilled so air can move inside; fans and a dehumidifier then run until a moisture meter shows the studs and the bottom plate are dry. Wet insulation behind the stucco is pulled out, since it stays wet for weeks.
It matters not only to find a leak quickly but to stop it as soon as possible, because the damage grows every day. A breakdown that seems minor and does not bother anyone at first can end with replacing the whole system and drying out floors and framing. If dampness and mold have already appeared in the corners, see how mold removal inside a wall works. Why time matters for floors is covered in our guide to fast water extraction.
Do not forget that a pipe leaking inside a wall is also dangerous because the wiring can short, and that can lead to a fire. If water reaches an outlet or switch, turn the power off at the breaker and call an electrician.
When the leak has reached rooms with furniture and belongings, they are usually moved out first; this is what pack-out and contents storage is for. The overall process of water damage restoration for El Cajon homes starts with finding the wet zone and ends with dry framing.
How to Keep It From Leaking Again
Most leaks behind a hose bib start with a twist. Don't hang a heavy hose reel on the faucet, don't yank the hose, and don't force a stiff handle. Turn the water off at the faucet when you are done rather than leaving the hose under pressure at the nozzle. Keep the gap around the faucet flange sealed so rain can't get behind the stucco. If the faucet wobbles, have a plumber anchor it and check the joint behind it.
More articles on leaks and drying are in the restoration news section, and you can read what local homeowners wrote about us or learn who we are and how we work on the El Cajon restoration company home page.