

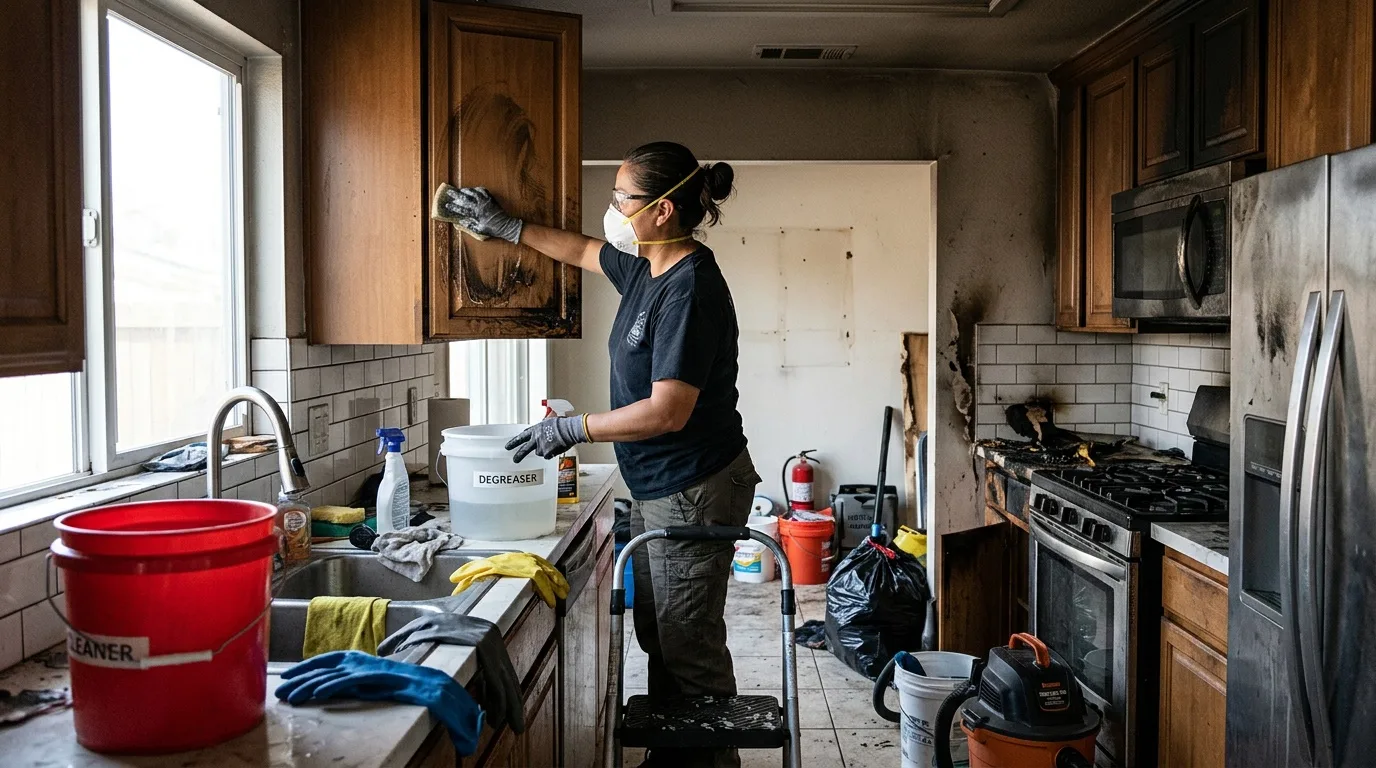
Why You Should Not Delay Cleanup After a Kitchen Fire
A fire is not just stress and destruction — it leaves behind difficult consequences that need to be dealt with quickly. Soot, smoke residue, and an acrid smell penetrate deep into furniture, finishes, and appliances. To return a kitchen to a livable state, a thorough and properly organized cleanup is necessary. It involves several mandatory stages, each with its own specifics.
The black, slightly greasy layer that settles on surfaces after a fire consists of the finest particles of burned materials. On contact with water, this residue turns into a sticky paste, which makes cleaning considerably harder. That is why it is so important to act promptly and follow the correct sequence of steps. The longer soot stays on surfaces, the more difficult it becomes to remove.
Before You Start: Safety and Preparation
Before beginning any work in a fire-damaged kitchen, put on protective clothing, rubber gloves, a respirator or at least a thick gauze mask, and safety goggles. Soot particles contain toxic compounds that should not be inhaled or allowed to contact skin.
Cover the floor with plastic sheeting or old newspapers, taping the seams together. This makes it easier to collect the black, greasy dust later. Remove any surviving items — dishes, small appliances, food — from the kitchen and set them aside for separate cleaning.
Make sure the gas and electricity to the kitchen are shut off. Check that structural elements — walls, ceiling, floor — are not compromised. If there is any doubt about structural integrity, have a professional inspect the space before you enter.
Step 1: Remove Debris and Damaged Items
The first thing to do is get rid of items destroyed by the fire. Cabinets, curtains, decorative trim, plastic moldings — anything that is charred or melted beyond saving should be taken out of the kitchen and disposed of. These items also absorb the smell of smoke deeply, and removing that odor from them is nearly impossible.
Haul out the trash, including pieces of drywall, insulation, or flooring that were directly exposed to flames. The goal is to strip the kitchen down to surfaces that can actually be cleaned or refinished.
Step 2: Ventilation
Open every window and door in the house, not just in the kitchen. Create a cross-draft and let it run for at least five to six hours. Fresh air circulation is the simplest first step toward reducing the concentration of smoke particles and the sharp smell of burning.
If the fire happened during cold months, you will still need to ventilate. A few hours of cold air is far better than letting toxic residue settle deeper into porous materials.
Step 3: Dry Cleaning — The Most Important Rule
This is where many El Cajon homeowners make a critical mistake: they grab a wet rag and start wiping. Under no circumstances should you wet a soot-covered surface first. Water turns soot into a stubborn, sticky film that sinks into the pores of plaster, wood, and painted surfaces. Getting it out after that is almost impossible.
Begin with dry methods. Use a powerful vacuum cleaner with a brush attachment, working from the ceiling down to the floor. A stiff-bristled brush can also be used — make short, sharp, flicking motions rather than rubbing back and forth, which only smears the residue deeper into the material.
Go over every surface — ceiling, walls, the tops of remaining cabinets, window frames, door frames. Only after removing the bulk of the dry soot should you move to the next step.
Step 4: Wet Cleaning of Surfaces
Once the dry soot has been removed, prepare a cleaning solution. A simple and effective option: dissolve two to three tablespoons of washing soda and one tablespoon of liquid dish soap in five liters of warm water. Alkaline cleaners work best against the greasy component of kitchen soot, which is always mixed with cooking oils and fats.
Work in small sections — roughly two feet by two feet — wiping each area and immediately drying it with a clean cloth. Change the water frequently; as soon as it turns dark, replace it. Using dirty water just redistributes the soot.
Different Surfaces Need Different Approaches
- Painted or whitewashed walls and ceilings: Wipe with a cloth dampened in rubbing alcohol or a diluted solvent. In most cases, the surface will need to be repainted afterward — cleaning alone rarely restores the original appearance.
- Tile and ceramic surfaces: These clean up relatively well with an alkaline or vinegar-based solution. Scrub grout lines separately with a stiff brush.
- Laminate, plastic trim, baseboards: Can be cleaned with mineral spirits or a degreasing household cleaner. Use soft sponges to avoid scratching.
- Metal surfaces (appliances, range hoods, sinks): Acidic cleaners or mild abrasives work here. Stainless steel should be wiped along the grain.
- Glass (windows, oven doors): A cloth with soapy water or a vinegar solution is usually sufficient. Stubborn spots can be soaked with vinegar for twenty to thirty minutes before wiping.
- Wood (exposed beams, wooden cabinets that survived): Requires specialized wood cleaners followed by light sanding if the soot has penetrated the finish.
Step 5: Getting Rid of the Smoke Smell
The burnt smell after a kitchen fire is caused by volatile organic compounds that keep releasing from walls, fabrics, and porous materials even after visible soot has been removed. A regular air freshener will not help — it simply mixes with the smell of smoke and makes things worse.
Several approaches work:
- Water absorption: Fill large pots and buckets with cold water and place them around the kitchen and adjacent rooms. Water absorbs airborne odor particles. Adding a tablespoon of vinegar to each container improves the effect.
- Activated charcoal: Spread bowls of crushed activated charcoal tablets around the kitchen. Charcoal is a natural adsorbent that pulls odor molecules from the air.
- Baking soda: Sprinkle baking soda on upholstered surfaces, rugs, or fabric that survived the fire. Let it sit for several hours, then vacuum it up.
- Ozone treatment: For severe cases, professional ozone generators can break down odor molecules at the chemical level. This is typically done by restoration companies.
It is important to understand that if you try to paint or refinish surfaces before fully removing the soot and neutralizing the smell, the odor will get sealed underneath and will come back within a couple of weeks. Every surface must be cleaned down to bare material, then primed with a stain-blocking primer, and only after that painted or re-finished.
Step 6: Disinfection
After a fire, toxic substances remain in the air and on surfaces. Soot from burned plastics, synthetic fabrics, and electrical insulation can contain harmful chemicals. A thorough disinfection is necessary before the kitchen can be used again.
Wipe all cleaned surfaces with a disinfecting solution. Pay special attention to areas near the stove, ventilation openings, and under the sink — places where moisture can combine with residual soot and promote mold growth. In the El Cajon climate, where warm temperatures persist for much of the year, mold can establish itself quickly in fire-and-water-damaged areas.
Step 7: Evaluate What Can Be Saved
Some items and materials can be restored after a kitchen fire. Ceramic and metal cookware can usually be cleaned and reused. Wooden furniture may be salvageable after deep cleaning and sanding. Upholstered items and soft furnishings — seat cushions, curtains, tablecloths — can sometimes be saved through professional dry cleaning, though heavily smoke-saturated fabrics often need to be replaced.
Appliances that were in the fire zone should be inspected by a technician before being plugged in again. Heat can damage internal wiring and electronic components in ways that are not visible from the outside.
Step 8: Repairs and Restoration
Only after all products of combustion have been removed and the smell of smoke has been neutralized can you move on to actual repairs. Starting renovation work in a kitchen that still smells of fire is a common mistake — the odor will migrate into new materials and finishes.
Typical repair work after a kitchen fire includes replacing damaged drywall, repainting walls and ceiling with a stain-blocking primer followed by finish coats, installing new flooring if the existing floor was warped or stained, replacing electrical wiring and outlets that were exposed to heat, and updating ventilation ducts that may have accumulated soot inside.
If the fire affected the kitchen's plumbing, gas lines, or load-bearing elements, those repairs should be handled by licensed professionals before any cosmetic work begins.
When to Call a Professional Restoration Company
A small grease fire that was put out quickly and left only light soot on the ceiling and backsplash can often be handled by the homeowner. But if the fire burned for more than a few minutes, damaged cabinets or walls, or if the smoke spread to other rooms, professional help is the more practical choice.
Restoration companies have industrial-grade equipment — commercial air scrubbers, thermal foggers, ozone generators — that homeowners typically do not have access to. They can also handle insurance documentation, which is often required for fire damage claims.
For El Cajon homeowners, acting quickly after a kitchen fire — even a small one — is the most important thing. The sooner cleanup begins, the less damage soot and smoke will do to your home, and the faster your kitchen will be back to normal.